Your audio input box and understanding on how to set the proper recording levels, is imperative to get the best quality sound going into your digital audio workstation – DAW. Now myself when I got into the electronic age of recording – in late 2010, I was completely lost some years ago when I started tinkering around with DAW’s. I came from the old school age where we were using recording tapes and such to capture any type of a recording for demo purposes and having original musical content out there. Needless to say when it came to trying to understand the concepts of recording levels, audio clipping, gain staging and all that jazz; all going into a computer? I was lost.
The world and the music industry has changed so much since then. Now a days if you want to have current relevant musical content out there, it’s a good idea to stay informed and keep yourself in the know how, of how these new recording methods work. This will not only keep you up to speed in current music technology, but it also makes it invaluable to your own musical career progression,to your band mates and your musical networking circles.
Recording Levels Methodology Current Day
Now stepping a few years into the future, what I’ve learned is that the recording levels need to be set at the right db not only for the guitar signal per se. But to allow recording levels to work correctly for the band as a whole. You’ll need to keep in mind or visualize if you will, on how they will fit in the framework of the mix to leave breathing room for everyone in the band. Different instruments occupy different frequencies in the audio spectrum. So what does this all mean in a recording music context?
Well the recording levels cannot be set so high that all we are concerned about is avoiding a guitar signal clipping, which I agree can be a whole problem unto itself. Aside from just the instrument level not clipping, there needs to be consideration in leaving some head room sonically, for the other instruments: drums, bass, piano, vocals, and other instruments that need to be included. As well as adjustments that will be happening in the final mix with compressors, delays and other effects.
Are The Recording Levels Too Low?
When referring to recording levels at the source, we are talking about the input levels going into your DAW – digital audio workstation. So your first step will be to monitor your direct input levels going into the USB audio interface that need to be set correctly. Are you recording an instrument such as a guitar? Or using a microphone line to input the signal? This will make a big difference in the kind of signal response your daw is picking up and how it impacts your recording level settings. As far as a guitar signal goes, if it is a DI signal, then you will want to use the instrument setting on your audio interface to adjust your recording levels right at the source.This is where it all begins, so it’s best to get everything going in the right way right from the very start.
Recording Levels Running Too Hot?
Next test, is to look for the possibility of the signal clipping. If the gain dial is showing red that means your signal is going in too hot, and you will have to back it off a bit. See the usb audio interface diagram below. The left channel has a halo lighting up in green which is great, whereas the right channel’s halo is lit up in red which means you’ll have to back off the gain a bit. The red lighting means that your signal is clipping although it may not be audibly apparent sometimes. The preferable signal to noise ratio is in that sweet spot where the halo is in the green right before going into the the red.

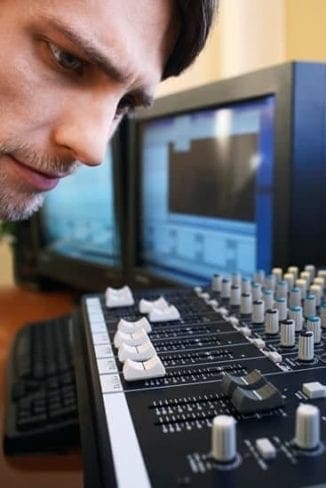
Recording Levels: a USB Audio Interface is an excellent tool to record music tracks with.
Signal To Noise Ratio vs. Recording Levels
Just as important you want to test the signal that has the most amount of output. This is particularly important when using heavier tones, which I myself tend to use a majority of the time. Testing the signal to noise ratio in a high output situation is critical in assessing in having the correct recording levels. This would be done through testing some heavy palm mute action in this instance. You may notice that your green halo signal may enter into red territory, if this is the case you’ll want to slightly back off the gain a bit until the signal goes into green territory once again while playing some heavy palm mutes. Last important point, is if your gain is backed off too much (also known as running a low signal), you’re probably feeling safe in the green territory but you won’t be getting the most efficient signal. That’s because if the signal is too low, you will find there will be some noise in the DI track in comparison to the total output. And we definitely don’t want that either.
There is no specific set point for all guitars, that would make life easier but unfortunately this is not the case. Every amp/audio box/guitar has its own sweet spot. So it’ll be up to you to find that magic spot, so take the time to play around with it. Keep in mind though use all the criteria mentioned in this paragraph as a rough guide to get you heading in the right direction.
DAW Recording Levels, And Leaving Headroom
Now let’s look at the signal a bit further down the signal chain. Within your daw’s interface what you are trying to achieve is to set the level at -18 db. The fact is gear such as outboard compressors, EQ analog consoles, even preamps built in your computer’s audio interface were set to sound their best at -18db. So this is the average recording level you should be trying to strive for. This will ensure you have the correct recording levels and leave ample headroom for adjustments within the mix.
Getting good recording levels means all the instruments will be able to cut through. With some proper gain staging after the fact – EQ’s, compressor and other effects, and setting the proper recording levels, I can guarantee you you’ll have all the tools needed at your fingertips to create killer tracks, whatever the musical genre you are in. Just remember these tips regarding recording levels, are tried tested and true in all musical genres.
Any Questions or Comments? Please Connect With Me
E-mail: shadowsjack66@gmail.com
Twitter: https://twitter.com/JShdows
Facebook: https://www.facebook.com/shadowsjack66